Tips & Tricks for a Smooth Transition
Share:
by USA Triathlon Certified Coach: Peter Lohrmann

A smooth transition can help make the difference between a successful race, and a stressful one. We easily dedicate hundreds of hours training and preparing our body to handle the physical demands of a race, but many people barely spend a single hour planning out their transitions. As a result, athletes can literally end up lost in transition. Avoid unnecessary frustrations using the tips below.
- Plan, Practice, Prepare. Spend time planning out your transition early on, practice it throughout your training. Prepare as much as you can before the event so that you just need to execute your plans on race day.
- Remove clutter. As you think about what is going to be needed on race day, don’t give yourself extra choices. Look at the weather beforehand, decide on your clothing, and be confident to your decision.
- Practice removing your wetsuit. Practice being self-sufficient, and plan to remove your own wetsuit.
Race Morning
Get there early. Arrive at the race venue early so that you have plenty of time to get yourself and your gear ready.
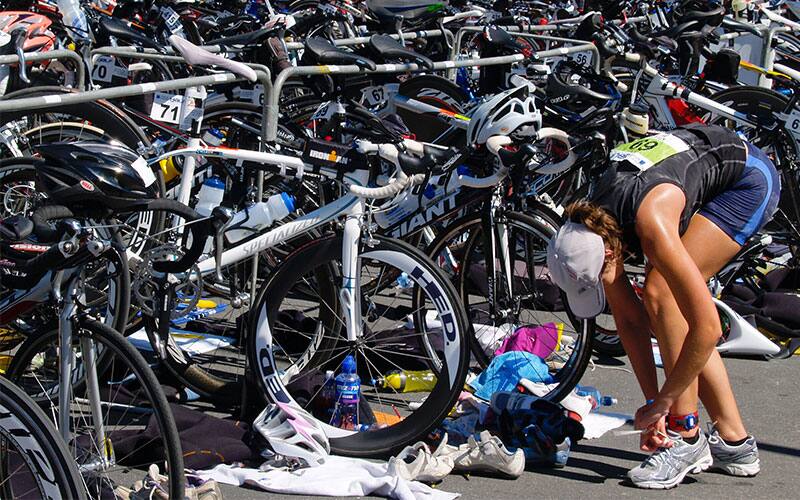
- Racking your bike. The last thing you want is to have your stuff moved be someone else because you didn’t set it up correctly. Your bike should be racked by the saddle with the front wheel down towards the ground. Place your gear on the ground to the right of your front wheel (when looking at your bike). If racked by the nose of your saddle, make sure your seat post (and water bottles) will fit under the bike rack. Make note if you need to tilt your bike to remove it from the rack.
- Make your transition area noticeable. While you’re not supposed to decorate your transition area with streamers and helium balloons, there are other ways to make it more noticeable. A bright or uniquely colored towel on the ground can be easily spotted as you run through the bike racks.
- Organize your transition area. Set up your transition area in the order that you plan to put on your gear. This way things don’t get tossed around while you are looking for something. Also, avoid hanging your helmet and sunglasses off your bike. If they were to fall, you wouldn’t want to spend time searching for your sunglasses, or worse finding out they were broken.
- Put baby powder in your shoes. Wearing socks on the bike is a personal preference, but not wearing them is going to save you time in transition. Generously sprinkle baby powder in your bike and run shoes to help prevent chafing and blisters.
- Know your route. Pick out immobile landmarks (e.g. lights, trees, buildings, etc) to help you navigate to your spot in transition, then physically do a run-through of your entire transition so that you know the shortest path to your bike from the swim exit and the bike dismount line. Visualize your transition step-by-step.
- Body Glide everywhere. Apply Body Glide to your neck, arms, and legs prior to putting on your wetsuit. Not only will it help prevent chafing on the back of your neck, but once you get in the water it will be easier to adjust your wetsuit for a better fit. Applying Body Glide to your calves, ankles, and heels beforehand will also help when removing your wetsuit.
- Put on wetsuit using plastic bags. They may not be environmentally friendly, but plastic grocery bags are the easiest way to get into your wetsuit! Put your foot in a bag before stepping into your wetsuit. This will help your foot slide right through, and help you get the wetsuit higher up your leg with much less struggling. Reuse the bag for your other foot and your arms. Putting on a wetsuit has never been so easy!
- Keep your swim cap and goggles on your head. As you’re exiting the water, just pull your goggles up onto your forehead instead of completely taking them off. This way you don’t drop them on your way into transition.
- Start at the top. When removing your swim gear, start at your head and work down to your feet. After you remove your wetsuit from your feet, put your bike gear on starting at your feet and working your way back up. Having a fixed order will help ensure you are consistent and don’t forget anything.
- Put on your bike shoes in transition. Many people try to save a few seconds by keeping their shoes clipped into their bike and doing a flying bike mount. Some race directors will not allow this due to safety concerns of athletes losing control of their bike. Avoid risking injury to yourself or someone else. Nobody wants to crash before even getting onto the bike course.
Transition 2 “T2” (Bike to Run)
- Dismount your bike. Safely come to a stop before the line, then dismount your bike. Simple is smooth. You may see some athletes slip off their shoes early and do a flying dismount. It can be fast, but it has many risks as well. To help ensure a consistent and smooth transition, keep your shoes on your feet.
- Keep your helmet clipped. It is against the rules to unclip your helmet while you are in contact with your bike. Officials will be watching for this! Wait until after you rack your bike until you touch the clasp on your helmet.
- Use a race belt. Get a race belt and pin your bib number to it. After you slide your run shoes on, just grab the race belt and put it on while you move through the transition area.
- The best part about transitions is that you can prepare everything beforehand. The better prepared you are going into the race, the smoother your transitions will be, and the faster you will get to the finish line. Wishing you an amazing season!
About the Coach
Peter Lohrmann and his wife Jennifer Santoyo are the Head Coaches of SOUND Training and Racing, based out of Seattle, Washington. They offer individualized training plans and remote coaching for all abilities. Peter is a USA Triathlon and USA Cycling Certified Level II Coach. He has been competing in triathlon for over a decade and has been on Team USA at multiple World Championships. Follow Peter on his new Instagram account @TriCoachPete.
Body Glide products help prevent rubbing that causes irritation, rash, chafing, blisters and raw skin. They are non-oily, invisible and blend into your skin. They stand up to sweat, humidity and water, and your skin breathes even as perspiration escapes. The products are used by the U.S. military, combat tough, yet safe and gentle for children. To learn more visit bodyglide.com.